How to make your home draught proof cheaply
Home Draught Proof Cheaply Seal Strip Tip Window Door: Complete Budget-Friendly Guide
Introduction
Learning how to make your home draught proof cheaply seal strip tip window door is one of the most effective ways to reduce your energy bills while improving comfort throughout your living space. Draughts are a silent energy thief, accounting for up to 25% of heat loss in many homes, yet most people don’t realize how much money they’re literally watching escape through gaps around windows and doors.
Table of Contents
- Introduction
- Why Home Draught Proof Cheaply Seal Strip Tip Window Door Matters
- Step-by-Step Home Draught Proof Cheaply Seal Strip Tip Window Door Guide
- Best Home Draught Proof Cheaply Seal Strip Tip Window Door Options
- Pro Tips for Home Draught Proof Cheaply Seal Strip Tip Window Door
- Common Mistakes to Avoid
- Key Takeaways
- Frequently Asked Questions About Home Draught Proof Cheaply Seal Strip Tip Window Door
- Conclusion
The good news? You don’t need to spend thousands on professional weatherproofing or expensive renovation projects. With the right knowledge and affordable materials, you can seal virtually every draught in your home for under $100. This comprehensive guide will walk you through practical, budget-friendly methods to eliminate draughts using readily available products and simple DIY techniques that anyone can implement, regardless of their skill level or home type.
Why Home Draught Proof Cheaply Seal Strip Tip Window Door Matters
Draughts are gaps and cracks that allow outside air to enter your home and conditioned air to escape. These invisible culprits exist around windows, doors, electrical outlets, baseboards, and wherever different building materials meet. Understanding why addressing draughts matters is essential to motivating yourself to take action, even if the initial effort seems small.
Energy Savings and Lower Heating Costs
The primary benefit of making your home draught proof cheaply seal strip tip window door is the dramatic reduction in your heating and cooling expenses. When warm air escapes during winter or cool air leaks out during summer, your HVAC system must work harder and longer to maintain your desired temperature. Studies show that properly sealed homes can reduce energy consumption by 15-20%, which translates to substantial savings on utility bills year-round.
For a household spending $1,500 annually on heating and cooling, a 15% reduction could save $225 per year. Over five years, that’s $1,125 in pure savings—easily justifying the small investment required for draught-proofing materials. These savings only increase if you live in a climate with extreme temperatures or harsh winters.
Enhanced Comfort Throughout Your Home
Beyond the financial benefits, properly sealed windows and doors eliminate uncomfortable cold spots and draughts that many homeowners tolerate without realizing they’re unnecessary. Those chilly spots near windows or the feeling of air movement near exterior doors are signs that your home isn’t properly sealed. Draught-proofing creates more consistent temperatures throughout your living spaces, making every room feel more comfortable during all seasons.
Additionally, reducing draughts improves indoor air quality by giving you control over ventilation rather than allowing uncontrolled air exchange through gaps and cracks. You can then use proper ventilation methods to ensure fresh air circulation without the energy waste of uncontrolled draughts.
Environmental Impact and Sustainability
Reducing your home’s energy consumption has significant environmental implications. Every kilowatt of electricity or unit of gas you save reduces your carbon footprint and contributes to environmental preservation. By choosing to make your home draught proof cheaply seal strip tip window door, you’re making a sustainable choice that benefits both your wallet and the planet.
The environmental advantage is amplified when you use recyclable or eco-friendly sealing materials, many of which are now available at low costs. This approach to home maintenance aligns with broader sustainability goals without requiring expensive green renovations.
Noise Reduction Benefits
An unexpected benefit of proper draught sealing is noise reduction. Gaps around windows and doors allow external noise to penetrate your home, whether it’s traffic sounds, neighborhood activity, or weather-related noise. By sealing these gaps, you create a quieter, more peaceful indoor environment, which contributes to better sleep and reduced stress levels.
Step-by-Step Home Draught Proof Cheaply Seal Strip Tip Window Door Guide
Before you begin, gather your materials and assess your home. A simple way to identify draughts is to hold a burning incense stick near windows and doors—the smoke will move if air is flowing through gaps. This visual method helps you prioritize where to focus your efforts.
Step 1: Inspect All Windows and Doors
Begin by systematically checking every window and door in your home for visible gaps and cracks. Open and close each door and window to ensure it moves freely and closes completely, as warped frames prevent proper sealing. Look for obvious gaps where you can see daylight, but also check the corners and edges where draughts often hide.
Make a detailed list of which windows and doors need attention, and note whether the gaps are small (under 1/4 inch), medium (1/4 to 1/2 inch), or large (over 1/2 inch). Different sealing methods work best for different gap sizes, so this assessment ensures you use the right materials for each location.
Step 2: Clean All Surfaces Thoroughly
For any sealing material to adhere properly, surfaces must be completely clean, dry, and free from dust, debris, and old caulk. Use a damp cloth to wipe down all window and door frames, paying special attention to the corners and edges where dust accumulates. For stubborn debris or old caulk, use a putty knife or old credit card to scrape surfaces gently.
Allow everything to dry completely before proceeding—moisture prevents adhesive weatherstripping from bonding properly. If you’re replacing old weatherstripping, remove it entirely and clean away any residual adhesive using rubbing alcohol if necessary.
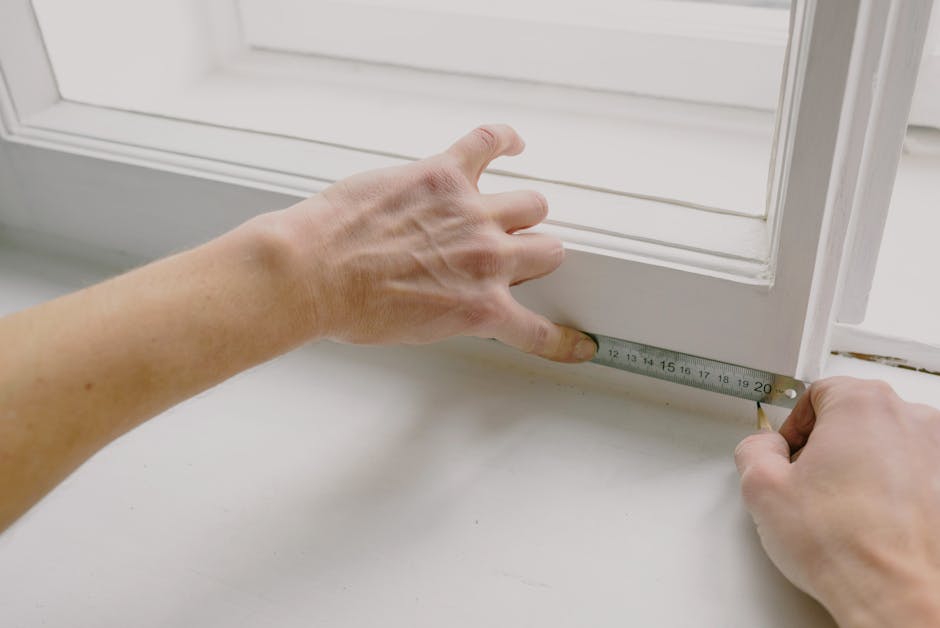
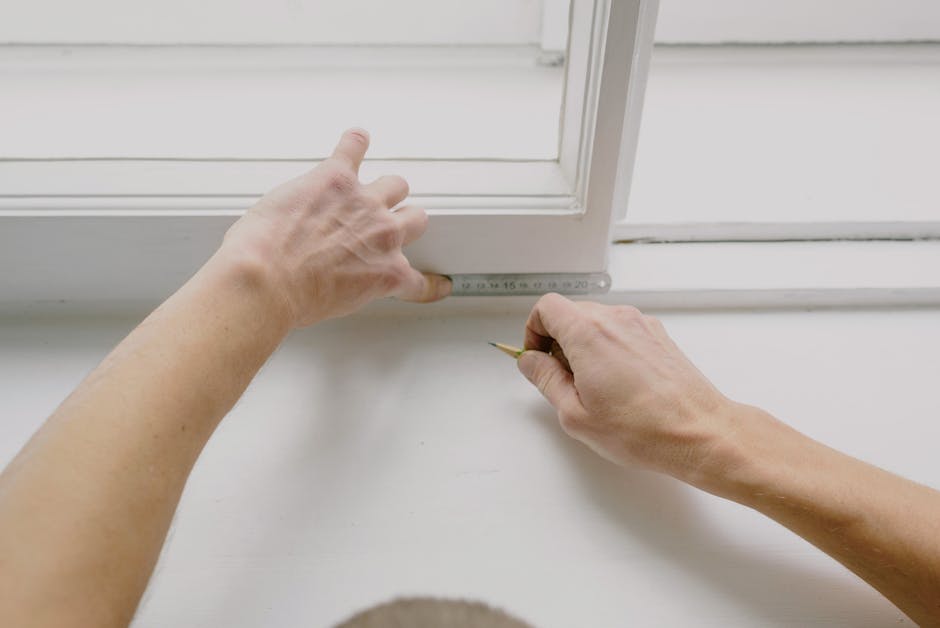
Step 3: Measure and Cut Weatherstripping
Measure the length of each gap or frame that needs sealing. For windows, measure around the entire perimeter where the sash meets the frame. For doors, measure around all three sides (top and both sides) where the door meets the frame. Adding 2-3 inches to your measurements ensures you have enough material with slight overlap.
Cut your weatherstripping using a sharp utility knife, making straight, clean cuts at 45-degree angles at corners when necessary. Having accurate measurements prevents waste and ensures professional-looking results.
Step 4: Apply Weatherstripping to Windows
Start with your windows, as these are typically easier to seal than doors. Peel back the adhesive backing on your weatherstripping (if self-adhesive) or apply the appropriate adhesive according to product instructions. Press the material firmly into place along the channels where the sash meets the frame, working from one corner around the entire perimeter.
For double-hung windows, apply stripping to all four sides of both upper and lower sashes. Ensure the stripping is straight and fully adhered—no gaps or wrinkles in the material. Close and open the window several times to ensure it still moves freely and closes securely.
Step 5: Apply Weatherstripping to Doors
Door sealing is slightly more complex because doors must close tightly while still opening smoothly. Apply stripping to the top and both sides of the door frame, positioning it so the door compresses the stripping when closed without excessive force that would prevent proper closure.
Many draught-prone doors also need threshold strips at the bottom, which prevent air from flowing under the door. V-shaped rubber or foam threshold strips are inexpensive and highly effective. Apply these according to manufacturer instructions, usually with adhesive backing that you simply peel and press into place.

Best Home Draught Proof Cheaply Seal Strip Tip Window Door Options
Different materials serve different purposes, and understanding your options helps you make cost-effective choices for your specific situation.
Adhesive-Backed Foam Weatherstripping
This is often the cheapest and most accessible option for homeowners. Foam weatherstripping is flexible, easy to apply, and works well for small to medium-sized gaps. The adhesive backing means no additional supplies are needed—simply clean the surface, measure, cut, and apply.
Foam stripping costs between $5 and $15 per roll, making it incredibly budget-friendly. The main drawback is that it compresses over time and may need replacement every 1-3 years, but given the low cost, this isn’t a significant concern. For renters or anyone wanting to test draught-proofing methods before committing to permanent solutions, foam is an excellent starting point.
Rubber Weatherstripping
Rubber weatherstripping is more durable than foam, lasting 5-10 years under normal conditions. It provides excellent sealing performance for both small and large gaps and resists weather exposure better than foam. Rubber options include self-adhesive varieties and those requiring caulk or nails for installation.
The cost is slightly higher ($10-20 per roll), but the extended lifespan makes it a better value long-term investment. Rubber works particularly well on exterior doors that experience frequent opening and closing, as it resists the wear that foam cannot tolerate.
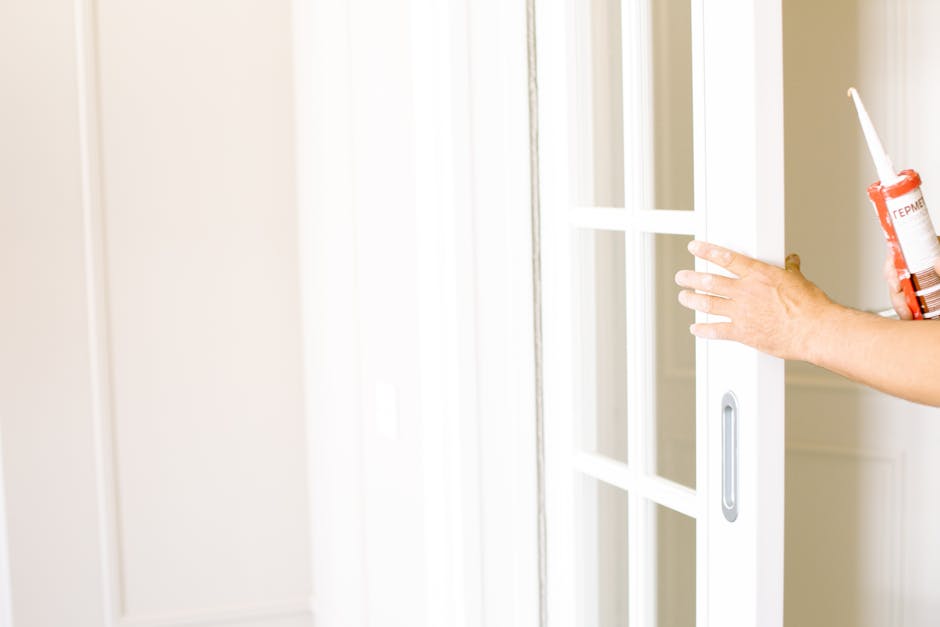
Silicone Caulk for Permanent Sealing
For gaps larger than 1/4 inch or permanent sealing applications, silicone caulk is an excellent choice. Unlike weatherstripping, caulk creates a sealed barrier that’s truly permanent—it doesn’t compress or require replacement. A single tube of silicone caulk costs $3-8 and can seal numerous gaps throughout your home.
The application process requires a caulk gun and some practice to create neat, professional-looking lines, but the results are worth the effort. Silicone is weather-resistant, remains flexible, and won’t crack or shrink like cheaper caulk alternatives. This method works best for gaps between fixed surfaces, not for moving windows or doors.
Door Sweeps and Threshold Seals
The bottom of doors is a major draught source that weatherstripping alone can’t address. Door sweeps and threshold seals are designed specifically for this purpose. A door sweep attaches to the bottom of the door and sweeps across the threshold as the door closes, pushing out any existing air gaps.
These typically cost $8-15 and install easily with adhesive backing or mounting hardware. They’re particularly effective for doors that don’t sit perfectly flush with the floor or where gaps exist due to floor settling or wear.
Removable Draught Excluders
For renters or temporary solutions, removable draught excluders filled with sand or foam are extremely affordable ($5-15) and require no permanent installation. These sit against the bottom of doors and can be moved or removed as needed, making them ideal for flexible housing situations.
While not as effective as permanent sealing methods, they significantly reduce draught infiltration and can be used in conjunction with other methods for maximum protection.

Pro Tips for Home Draught Proof Cheaply Seal Strip Tip Window Door
Prioritize High-Traffic Areas First
Focus your initial efforts on doors and windows you use frequently, as these account for the majority of draught infiltration in most homes. Exterior doors, particularly entry doors and doors leading to unheated spaces, should be your first priority. These areas typically represent 50% or more of draught-related heat loss.
By sealing high-traffic areas first, you’ll see the most dramatic impact on your comfort and energy bills, which can motivate you to complete sealing throughout your entire home. You’ll also develop skills and confidence that make subsequent sealing projects easier.
Use Caulk for Small Permanent Gaps
Caulk is more cost-effective than weatherstripping for very small gaps (under 1/4 inch) and creates a permanent, maintenance-free seal. Apply caulk to gaps between window and door frames and the surrounding walls, around baseboards, and anywhere else air can infiltrate.
Use painter’s tape above and below the gap to create clean lines, apply the caulk with a caulk gun, and smooth it with a wet finger. This prevents visible caulk lines and ensures proper contact with all surfaces. Remove the tape immediately after smoothing for the neatest appearance.
Don’t Forget Electrical Outlets and Light Switches
Many people focus on windows and doors but overlook smaller openings like electrical outlets and light switches on exterior walls. These can be surprisingly significant draught sources, especially in older homes with loose outlet boxes.
Inexpensive foam gaskets designed for outlets cost just $2-5 for a pack of 10 and install in seconds—simply remove the outlet cover, place the gasket behind it, and reinstall. This simple step creates a noticeable improvement in comfort near exterior walls.
Apply Weatherstripping to Interior Doors
Sealing interior doors that lead to unheated spaces (basements, attics, garages) is often overlooked but highly effective. If you heat your home to 70°F but an attached garage is 50°F, heat escapes through gaps around that interior door. Sealing interior doors to unheated spaces can be as important as sealing exterior doors.
This approach is particularly cost-effective because you’re using the same inexpensive materials but targeting areas where gaps often go unnoticed and unaddressed.
Consider Window Film for Added Insulation
For windows in rooms you use seasonally or where draught-proofing alone isn’t enough, inexpensive plastic window film provides additional insulation benefits. Clear shrink film kits cost $3-8 per window and create an additional air space that improves insulation value by 15-25%.
The film is removable and can be applied each fall and removed each spring, making it a temporary solution that complements permanent draught-proofing methods. This layered approach to sealing can reduce draught-related heat loss even further without significant expense.
Common Mistakes to Avoid
Using Poor-Quality Materials
The temptation to buy the cheapest weatherstripping or caulk available often results in poor performance and early failure. While budget-conscious choices are appropriate, the cheapest option is rarely the best value. Spend a few dollars more on quality foam or rubber weatherstripping—the improved durability justifies the cost difference.
Read reviews before purchasing and avoid suspiciously inexpensive products that might fail after a few months. Sometimes paying slightly more initially saves money by avoiding the need for replacement.
Improper Surface Preparation
Rushing through surface cleaning is the most common cause of weatherstripping failure. If adhesive doesn’t bond properly, the material peels away within days or weeks, wasting both money and effort. Always take time to thoroughly clean and dry all surfaces before applying any sealing material.
For surfaces with existing adhesive residue, use rubbing alcohol and a putty knife to remove it completely. Proper preparation takes 10 extra minutes but ensures results lasting months or years instead of weeks.
Blocking Necessary Ventilation
While draught-proofing is essential, completely blocking all air exchange is counterproductive and potentially dangerous. Kitchens and bathrooms need controlled ventilation to remove moisture and odors. Don’t seal dryer vents, range hoods, or bathroom exhaust vents—these should remain clear.
Also avoid sealing gaps around return air ducts for furnaces or air conditioning systems. These are designed to draw air from your home for conditioning and recirculation. Proper draught-proofing and proper ventilation work together, not against each other.
Applying Weatherstripping Over Paint
Never apply adhesive weatherstripping over painted surfaces—paint provides a slippery surface that prevents adhesive from bonding. Either scrape away paint to reach the bare surface or use non-adhesive weatherstripping that’s nailed or caulked in place instead.
This common mistake results in weatherstripping that falls off within days despite appearing to adhere initially. Taking extra time to remove paint or choose appropriate materials prevents frustrating failures.
Overstretching Weatherstripping
Stretching weatherstripping too tightly during installation creates excessive pressure when doors and windows close, making them difficult to operate and potentially damaging the frames or locking mechanisms. Install weatherstripping so it compresses slightly when the door or window closes—there should be firm contact without excessive resistance.
Test each door and window several times during installation to ensure smooth operation. If anything feels too tight, reposition the weatherstripping slightly farther from the frame edge.
Key Takeaways
-
Draughts account for significant energy waste: Properly sealing windows and doors can reduce heating and cooling costs by 15-20%, saving hundreds of dollars annually.
-
Weatherstripping is the most cost-effective solution: Adhesive-backed foam and rubber weatherstripping cost $5-20 per roll and seal the majority of draught sources in most homes.
-
Proper surface preparation is essential: Cleaning and drying all surfaces thoroughly ensures weatherstripping and caulk adhere properly and last as long as possible.
-
Multiple methods work best together: Combining weatherstripping on windows and doors with caulk for gaps and threshold seals for door bottoms creates comprehensive draught-proofing.
-
Maintenance and replacement extend effectiveness: Periodically checking weatherstripping for deterioration and replacing it when necessary maintains the draught-proofing benefits over time.
Frequently Asked Questions About Home Draught Proof Cheaply Seal Strip Tip Window Door
Q: What is the best home draught proof cheaply seal strip tip window door method?
A: The best method depends on your specific situation, but weatherstripping combined with caulk for gaps creates the most effective solution. Adhesive-backed foam weatherstripping works well for most windows and doors, offering excellent value at $5-15 per roll. For larger gaps or permanent sealing, silicone caulk is superior despite requiring slightly more skill to apply. For ultimate results, use weatherstripping on movable components (windows and doors) and caulk for stationary gaps, creating a comprehensive draught-proofing system.
Q: How do I use home draught proof cheaply seal strip tip window door materials correctly?
A: Start by identifying all draughts using an incense stick test or visual inspection. Clean and dry all surfaces thoroughly to ensure adhesive bonds properly. Measure gaps carefully and cut weatherstripping to length, applying firm pressure along the entire length as you install it. For caulk, use painter’s tape to create clean lines, apply with steady pressure, and smooth with a wet finger. Test all windows and doors to ensure they still operate smoothly after sealing.
Q: How long does weatherstripping last before replacement is necessary?
A: Quality foam weatherstripping typically lasts 1-3 years before compression reduces its effectiveness. Rubber weatherstripping is more durable, lasting 5-10 years in most applications. Regular inspection helps you identify when replacement becomes necessary—if you can see daylight through gaps or feel draughts returning, it’s time to replace the weatherstripping.
Q: Can I apply new weatherstripping over old weatherstripping?
A: No, always remove old weatherstripping completely before applying new material. Old, compressed weatherstripping doesn’t provide sealing benefits, and layering new material over it creates uneven surfaces and poor adhesion. Removing old material takes extra time but ensures superior results and longevity.
Q: Will draught-proofing affect my home’s ability to breathe?
A: Proper draught-proofing doesn’t prevent healthy air circulation. Your home needs controlled ventilation for indoor air quality, but this should come through designed ventilation paths (exhaust fans, fresh air intakes) rather than uncontrolled gaps. Draught-proofing simply ensures you control where air enters and leaves your home, improving both comfort and energy efficiency.
Conclusion
Making your home draught proof cheaply seal strip tip window door is one of the most practical and cost-effective home improvements you can undertake. With minimal investment—often under $100 for an entire home—you can reduce energy costs by hundreds of dollars annually while dramatically improving comfort throughout your living spaces.
The process requires no special skills or expensive tools, just patience, careful measurement, and attention to detail. Start with high-traffic exterior doors and windows, apply quality weatherstripping and caulk, and gradually work through your entire home. As you see results in your comfort and utility bills, the motivation to complete the project grows stronger. Begin your draught-proofing journey today and enjoy a warmer, more comfortable home while watching your energy bills decline.
Recommended Products on Amazon
As an Amazon Associate I earn from qualifying purchases.